Post
Salesforce (not so) Secrets: How to Enable Sharing on Cases
Posted on November 26, 2018 (Last modified on January 16, 2026) • 4 min read • 819 wordsCustomer Experience is more important than ever.

Customer Experience is more important than ever. Effective CX bolsters customer satisfaction, retention, and drives future revenue growth. Ineffective CX is the fastest way to turn your customers into evangelists for the competition.
And, as businesses adapt to the changing landscape of customer expectations, your audience’s tolerance for mediocre support is disappearing. Today’s customers expect (and deserve) responsive, personal, and engaging contact.
Two of the most important variables when it comes to your customers’ experience are velocity and consistency. Today’s audience expects responses in minutes, not days — across a variety of mediums. And repeating their account number, address, and issue to each new point of contact is frustrating and a surefire way to encourage them to start looking elsewhere.
You know all this. You implemented Salesforce to help you manage your cases, data, and details. You’ve got reps auto-assigned to cases to maximize 1:1 contact and give your customers the personal experience they deserve. But what do you do when you have more cases than your reps have time? Or when a customer’s issue rolls into the next shift? In 2019, making them wait is out of the question — so let’s talk about Sharing Cases! In today’s post we’ll walk through setting up Shared Case rules, so your CX reps can seamlessly hand-off customers, help each other pick up the slack during the busy season, or step up after a colleague’s surprise departure. With all of your customer’s information, conversations, and previous engagement intact, that transition can be seamless, consistent, and most importantly, immediate.
Let’s get started!
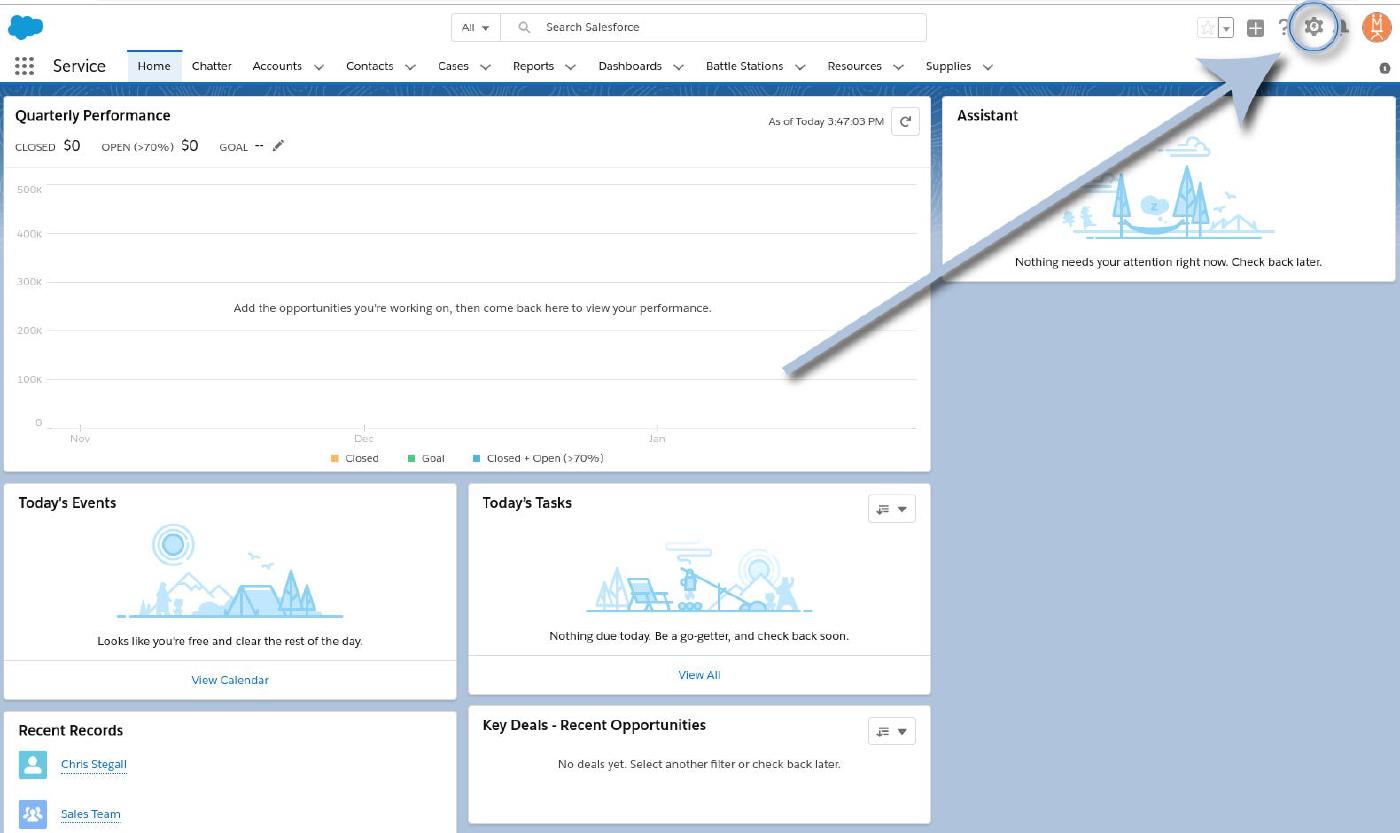
To begin, head to “Setup” by clicking on the gear wheel in the top right of your Salesforce instance.
And then select “Setup” from the dropdown menu.
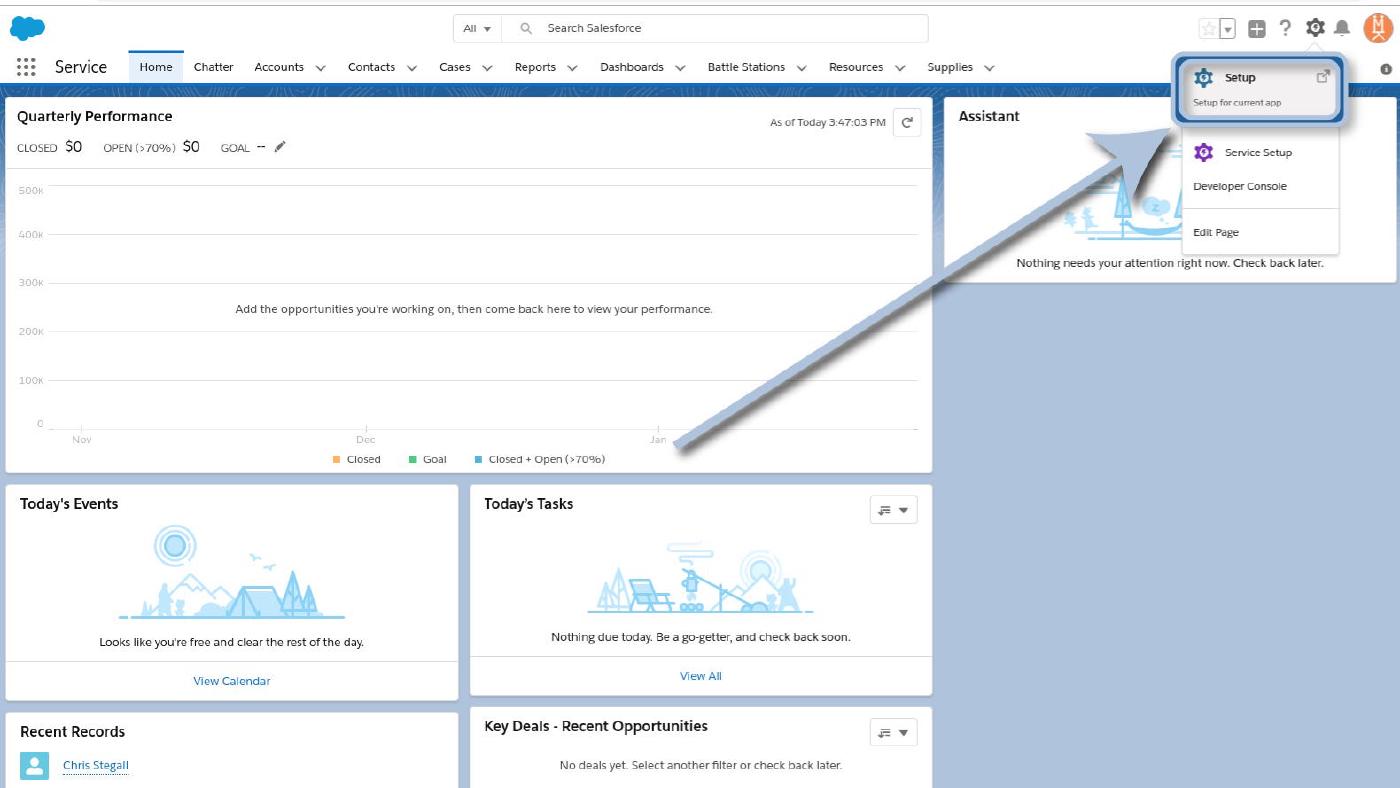
And that’ll take you to the Setup!
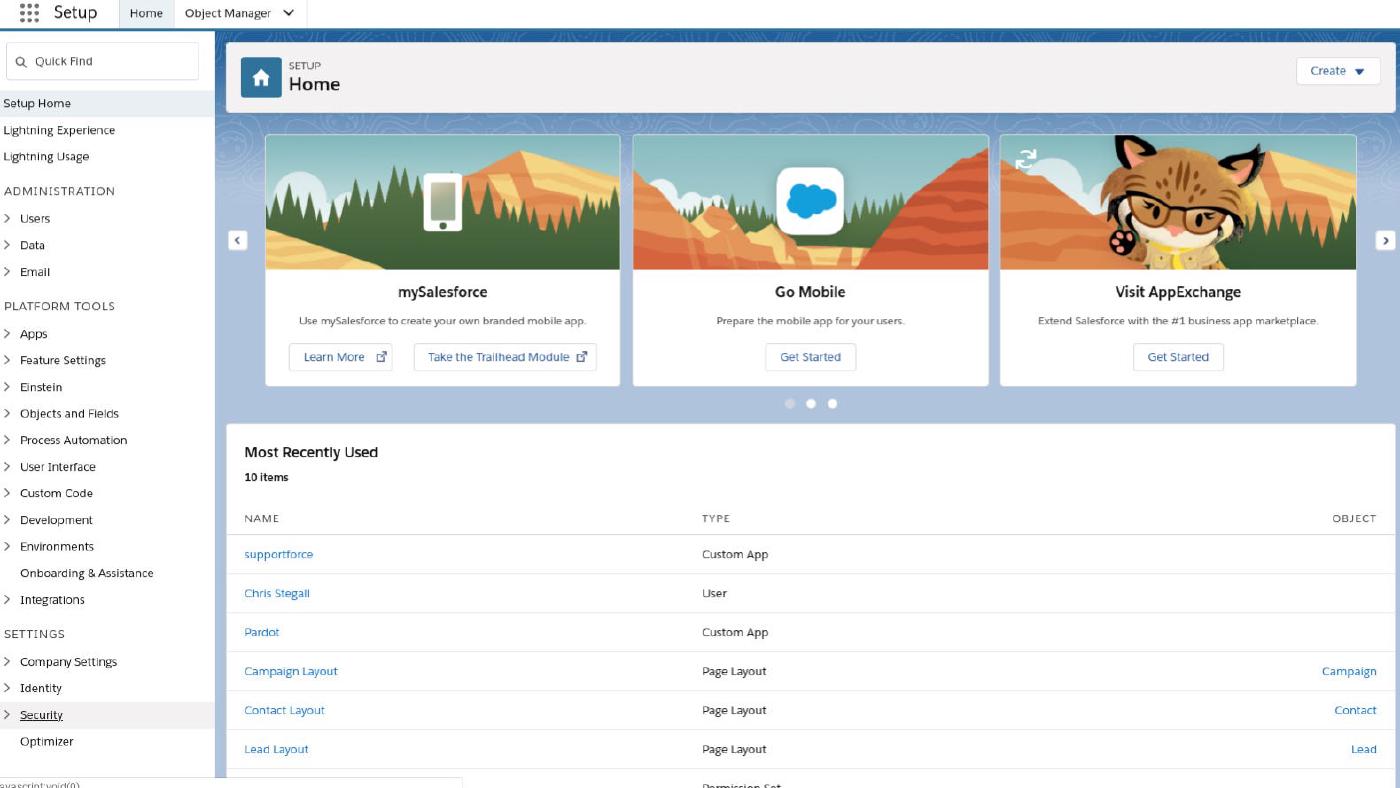
Now, look to the Setup Menu on the left hand side of your screen. Scroll down to Security and click the ‘>’ to expand it.
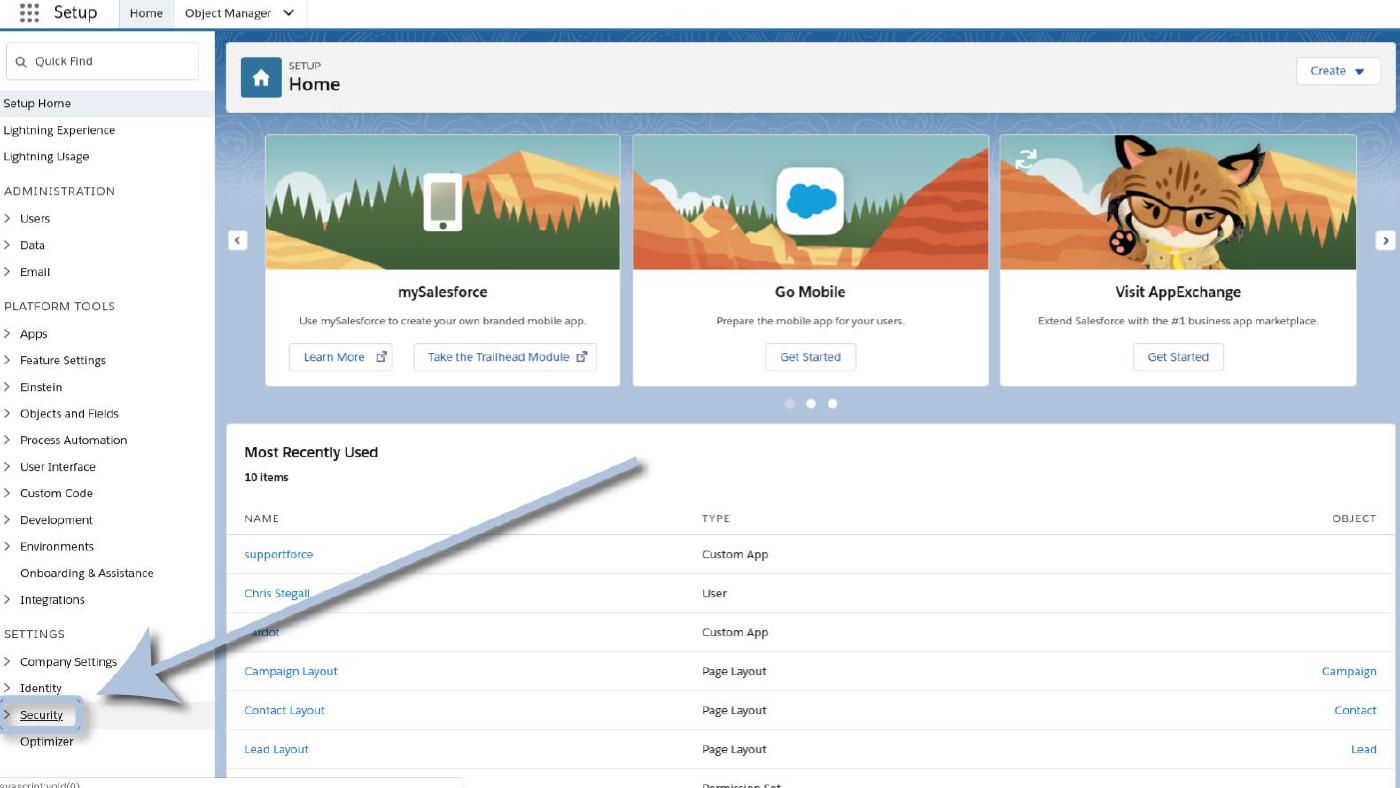
Scroll down and select ‘Sharing Settings’
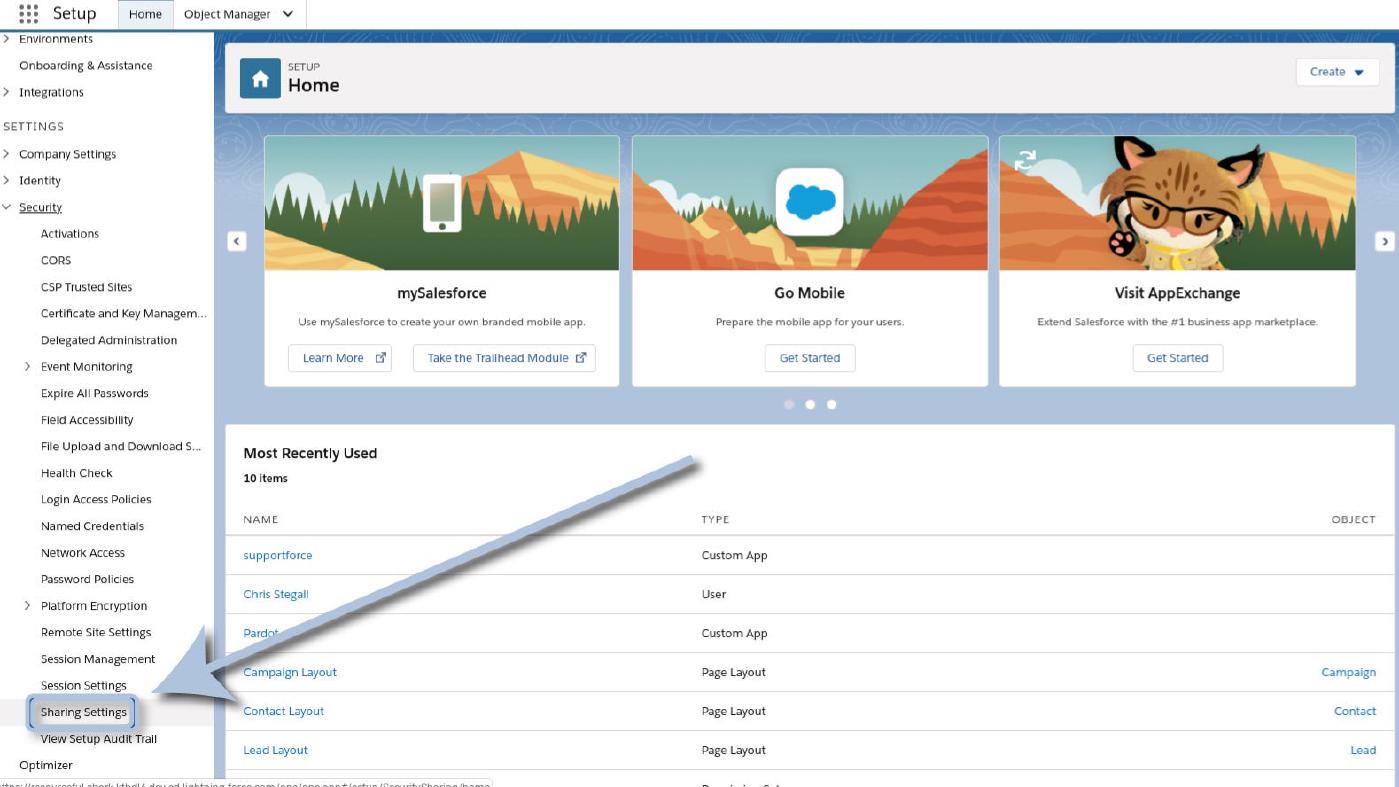
Note: In the future, you can save yourself the clicks by typing “Sharing Settings” directly into the search bar at the top of the Setup Menu. In fact, you’ll probably only need to type the first few letters.
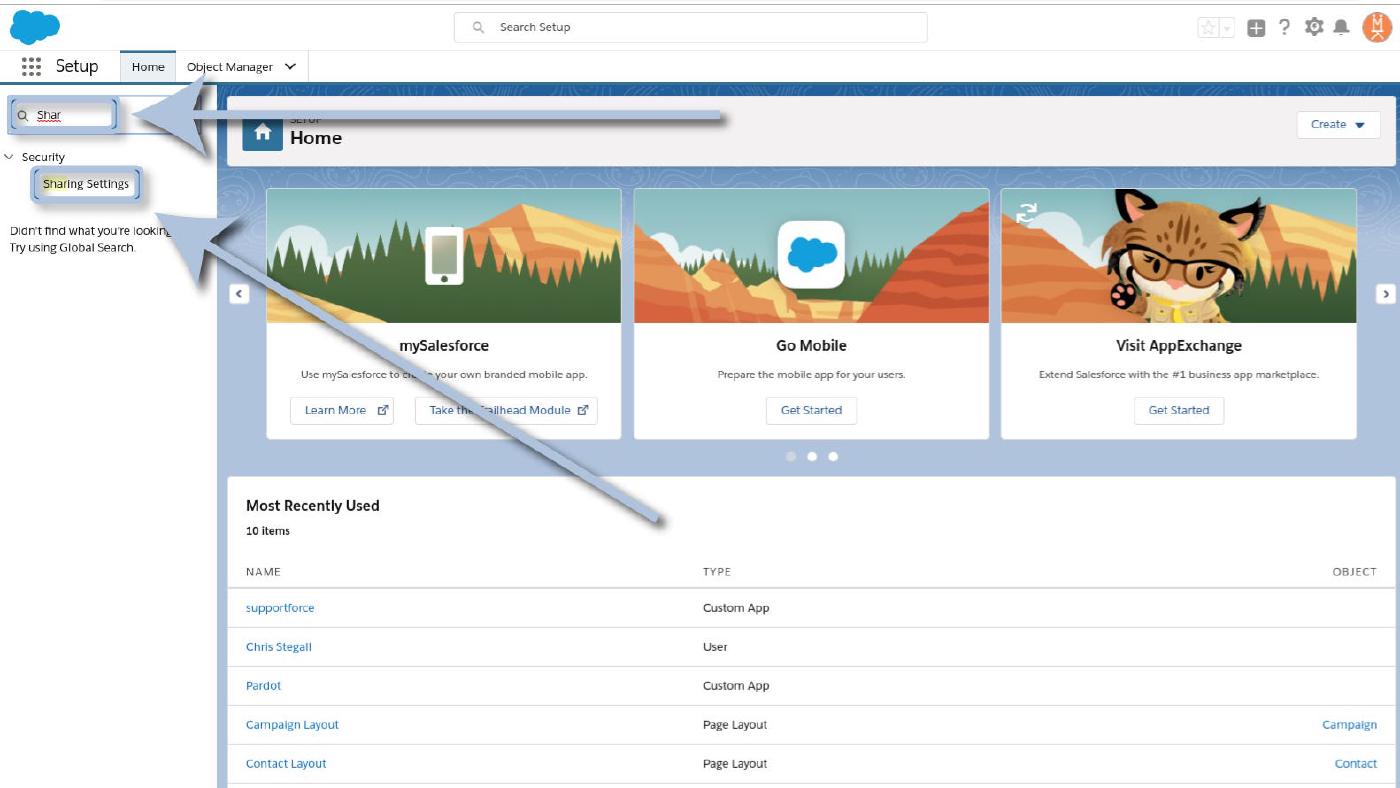
Perfect! You should now find yourself on the Sharing Settings page.
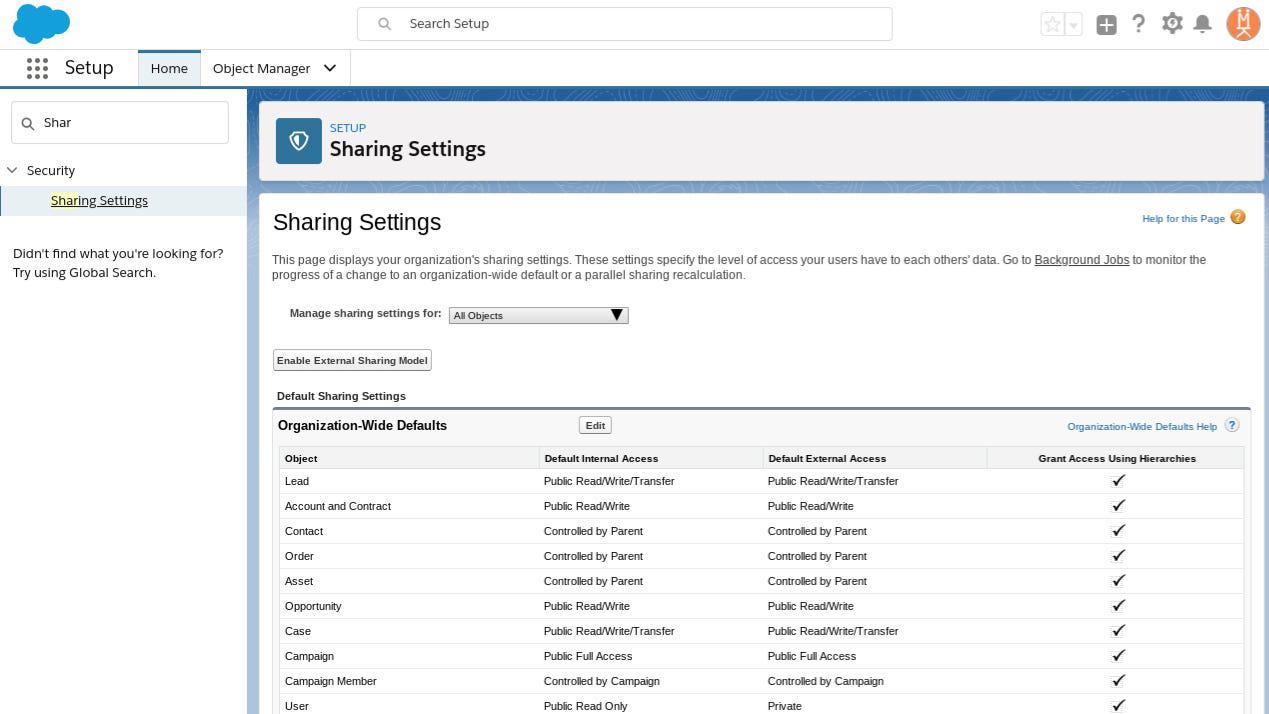
Find the ‘Organization-Wide Defaults’ section (usually front and center) and click the ‘Edit’ button at the top.
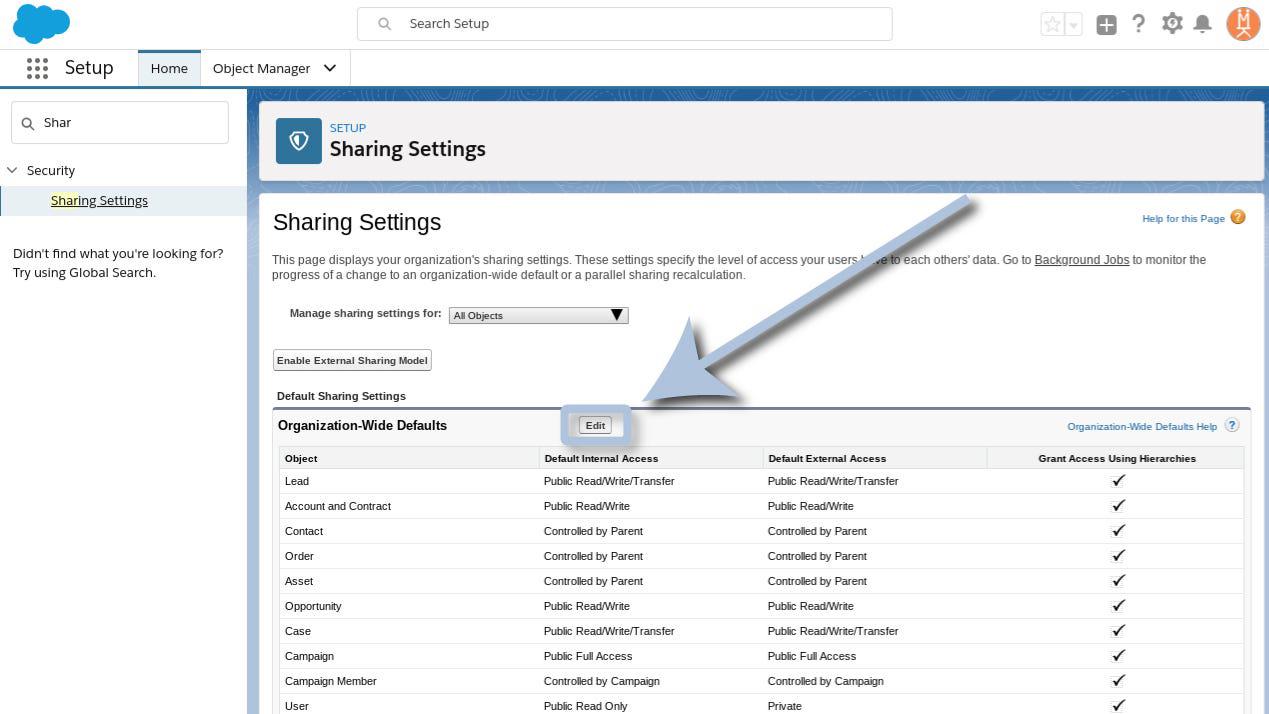
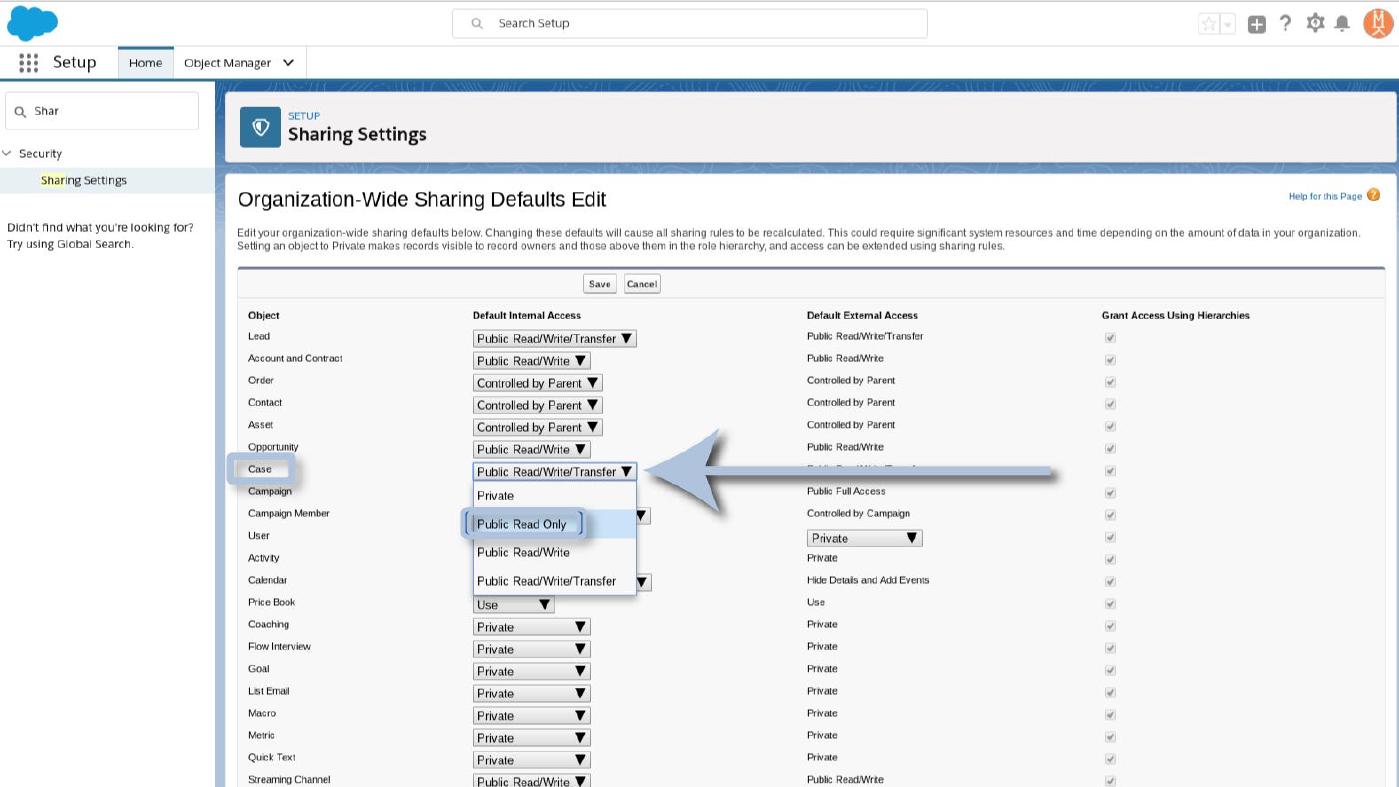
Navigate down to “Case” and use the dropdown menu to change its default to “Public Read Only”.
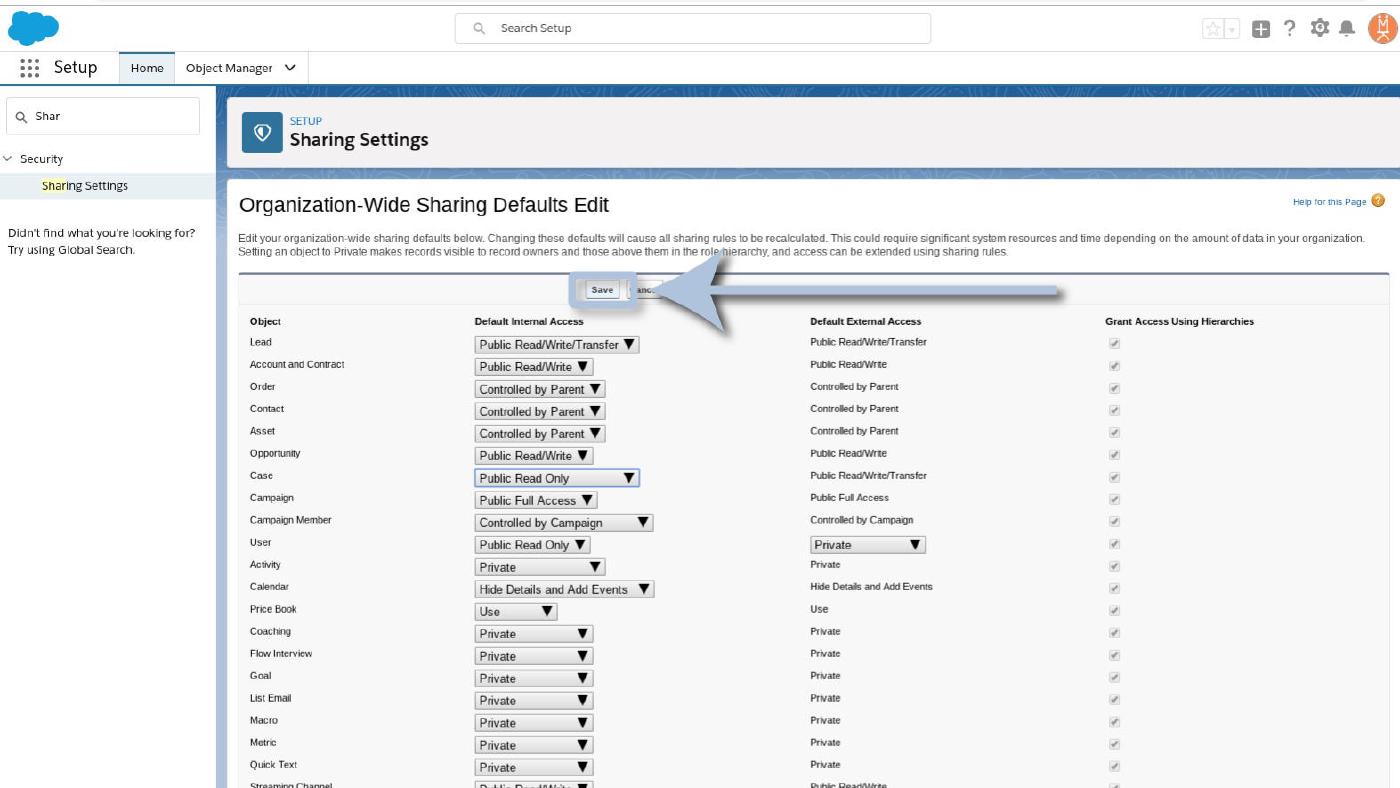
Note: After this next step you’ll likely get a pop-up notification from Salesforce. Don’t reflexively dismiss it. Do your best to fight that internet auto-pilot. Click ‘Save’.
Ok, there’s that semi-spooky pop-up notification that you didn’t immediately dismiss (way to go!).
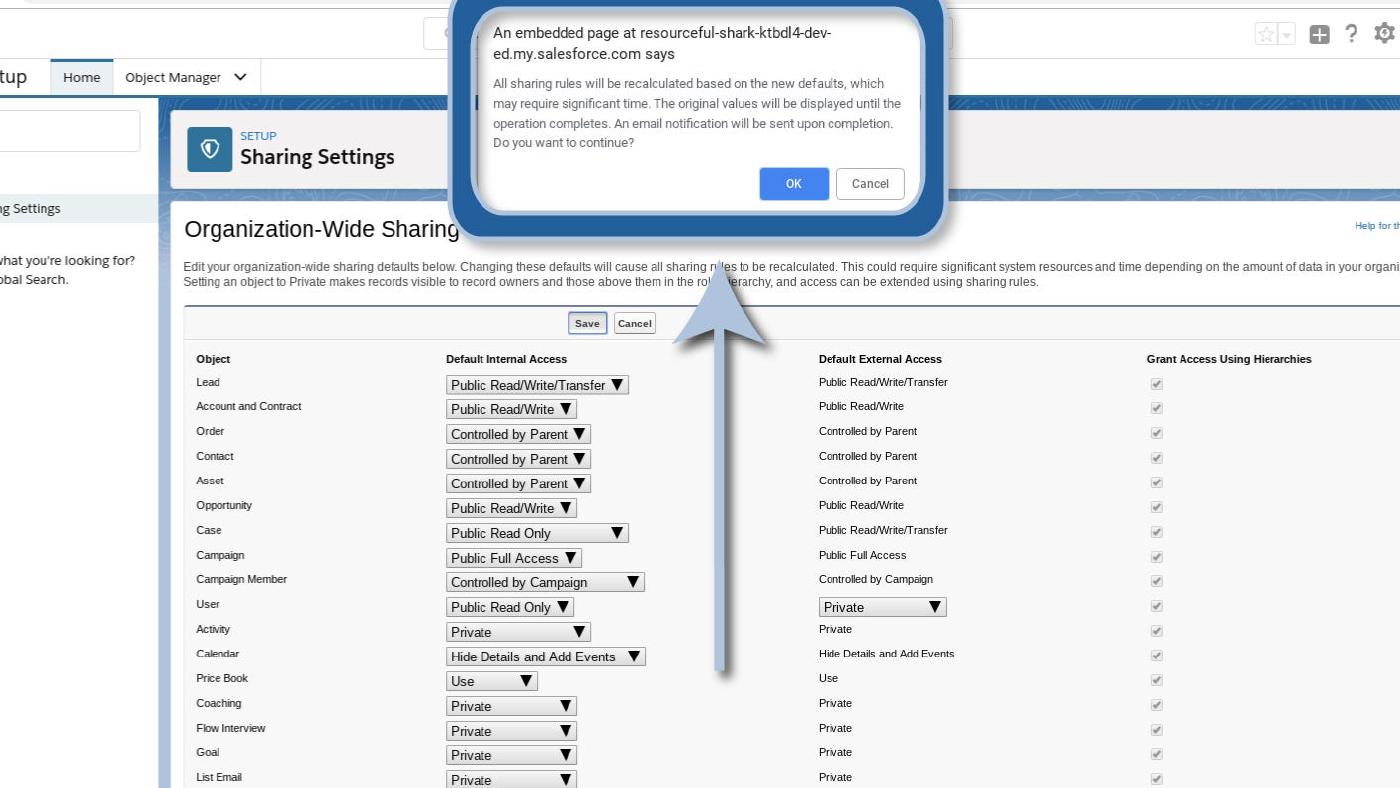
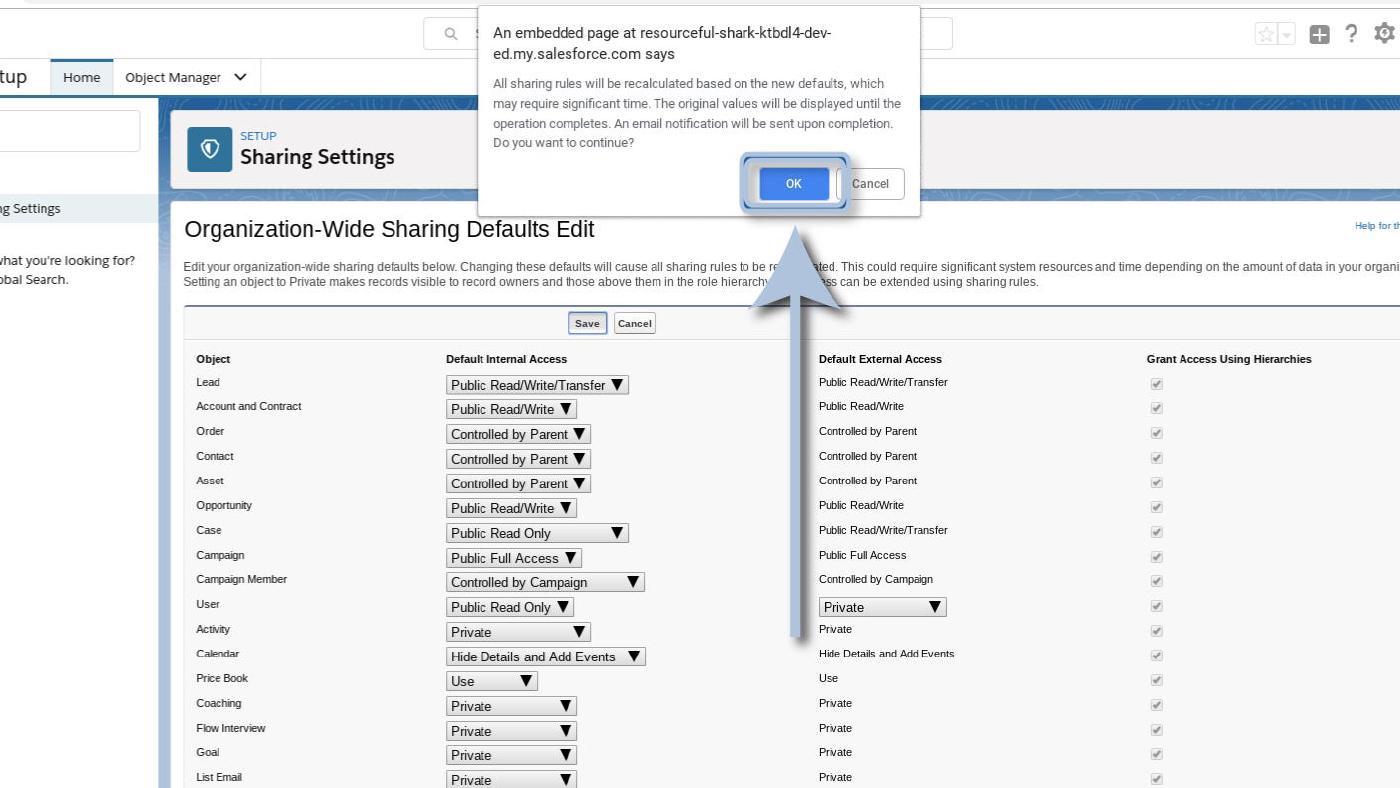
It actually only looks scary, it’s just letting you know that Salesforce is going to take some time recalculating things based on our change. Once the process is complete you’ll receive a notification email that you’re clear to keep working. Click “Ok” to dismiss the pop-up.
You’ll now see a yellow alert bar at the top of the page (and a few atop the lower sections) letting you know that Salesforce is processing the changes.
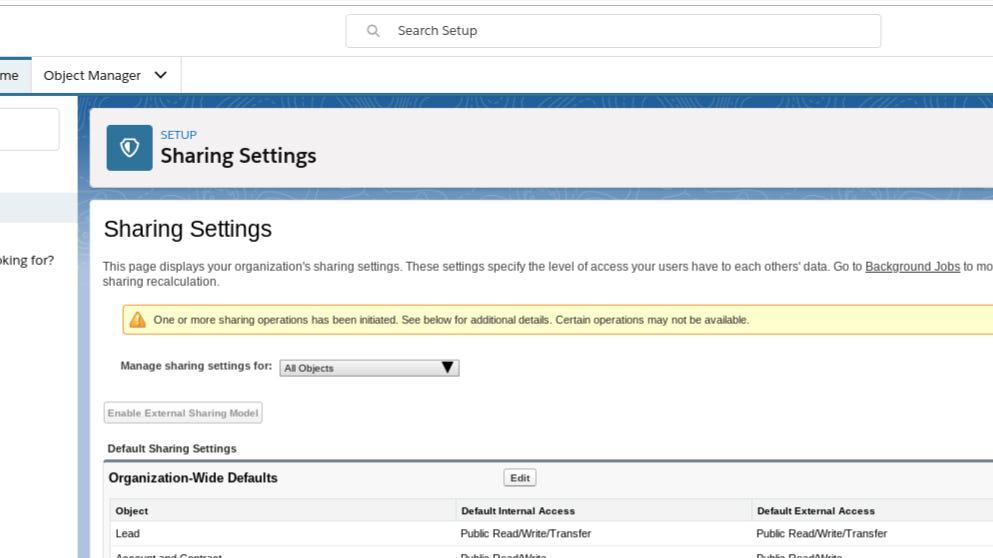
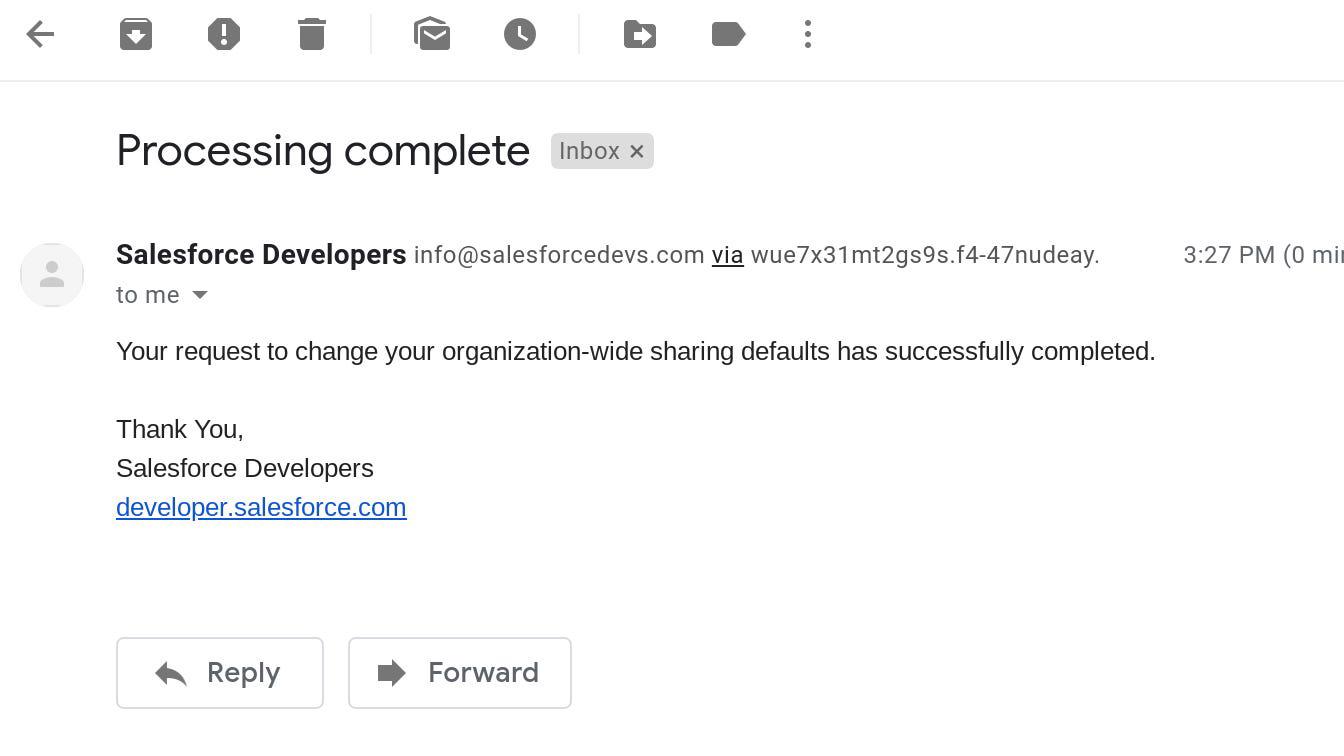
All you have to do is wait for your email notification that it’s finished.
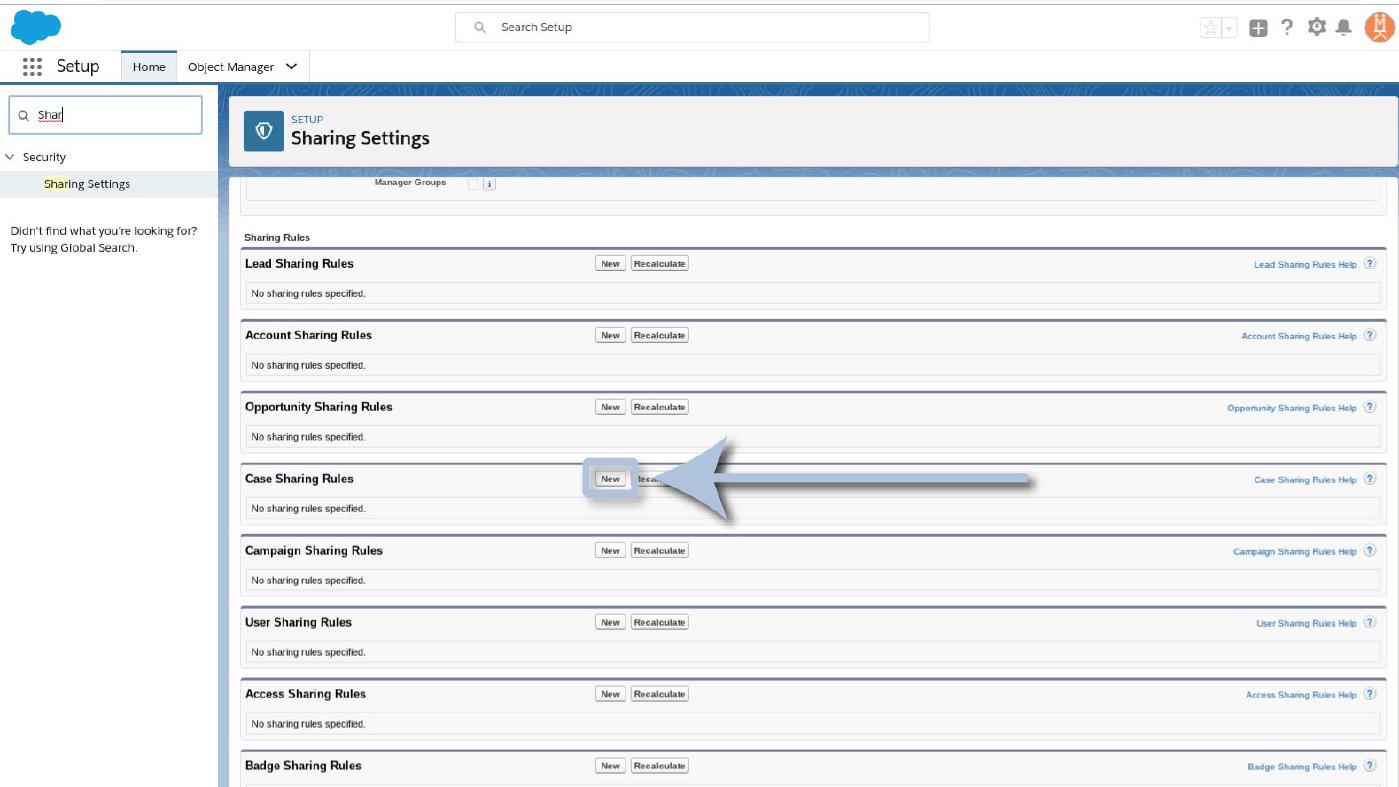
Note: In my sandbox environment the changes took about a minute. And now you’re ready to get back to work! Scroll down the “Sharing Settings” page until you see ‘Case Sharing Rules’ and click ‘New’.
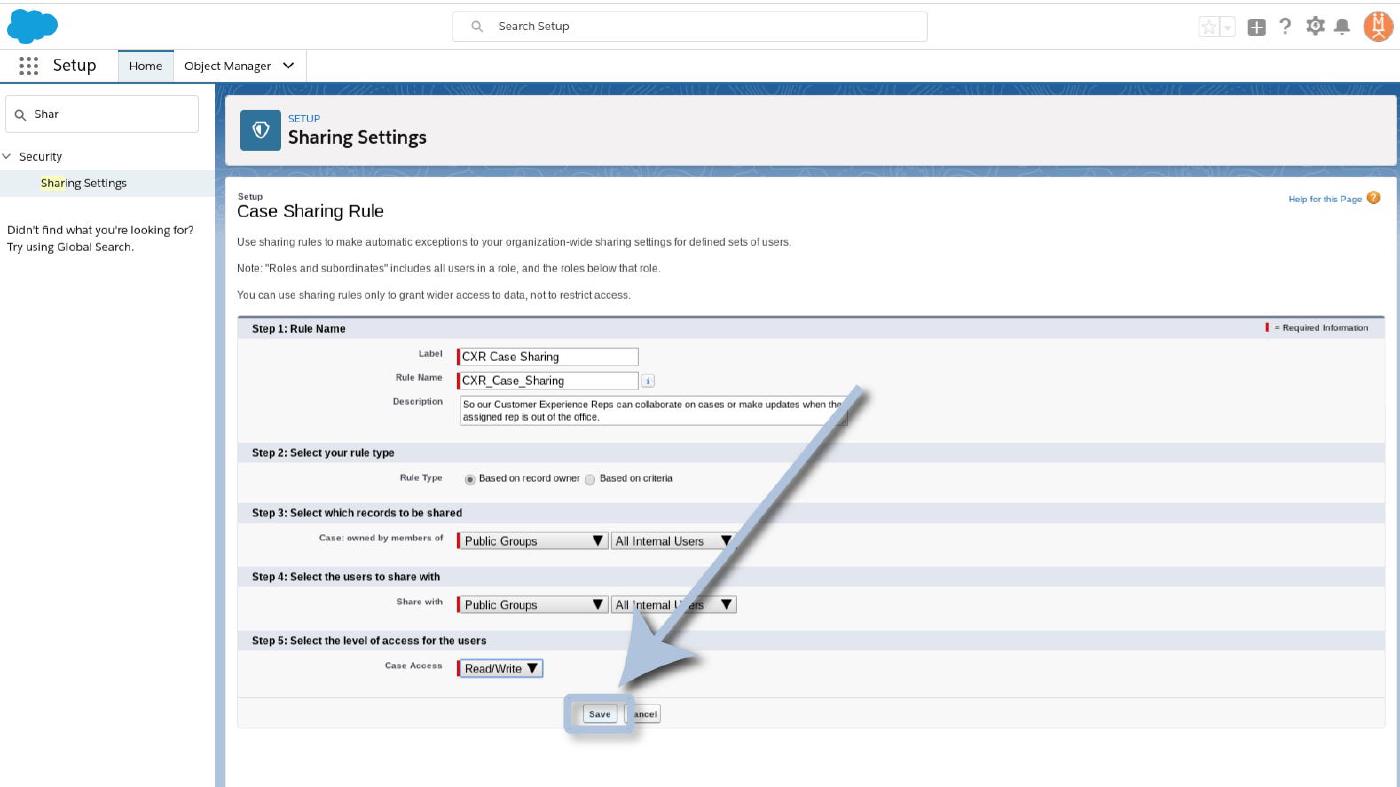
Almost there! Now you’ll see the available fields for your new case sharing rule with required fields highlighted by a red bar.

Begin by giving your sharing rule a label (this will be the name you see later when selecting which rules to apply).
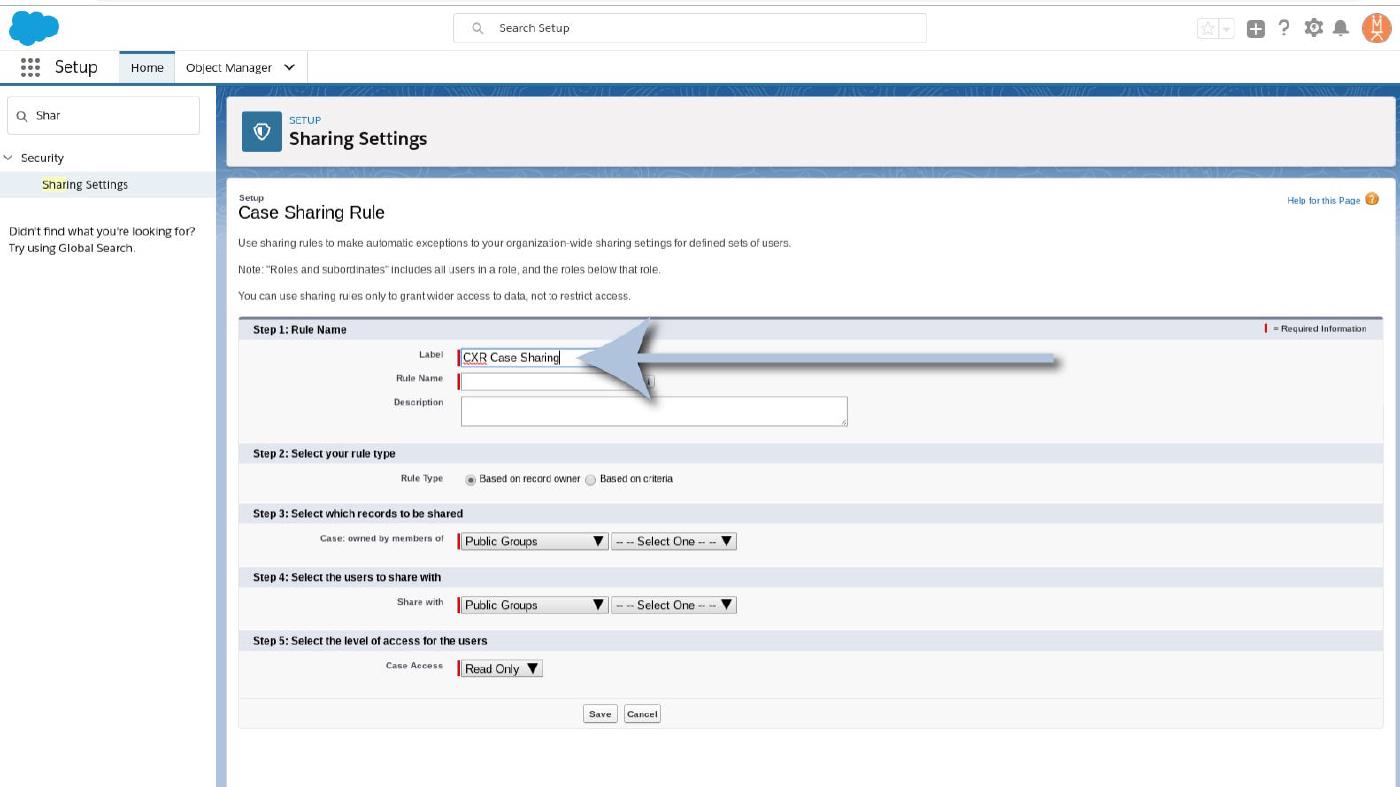
Hit ‘enter’, ‘tab’, or click into the ‘Rule Name’ field and Salesforce will auto-populate it for you.
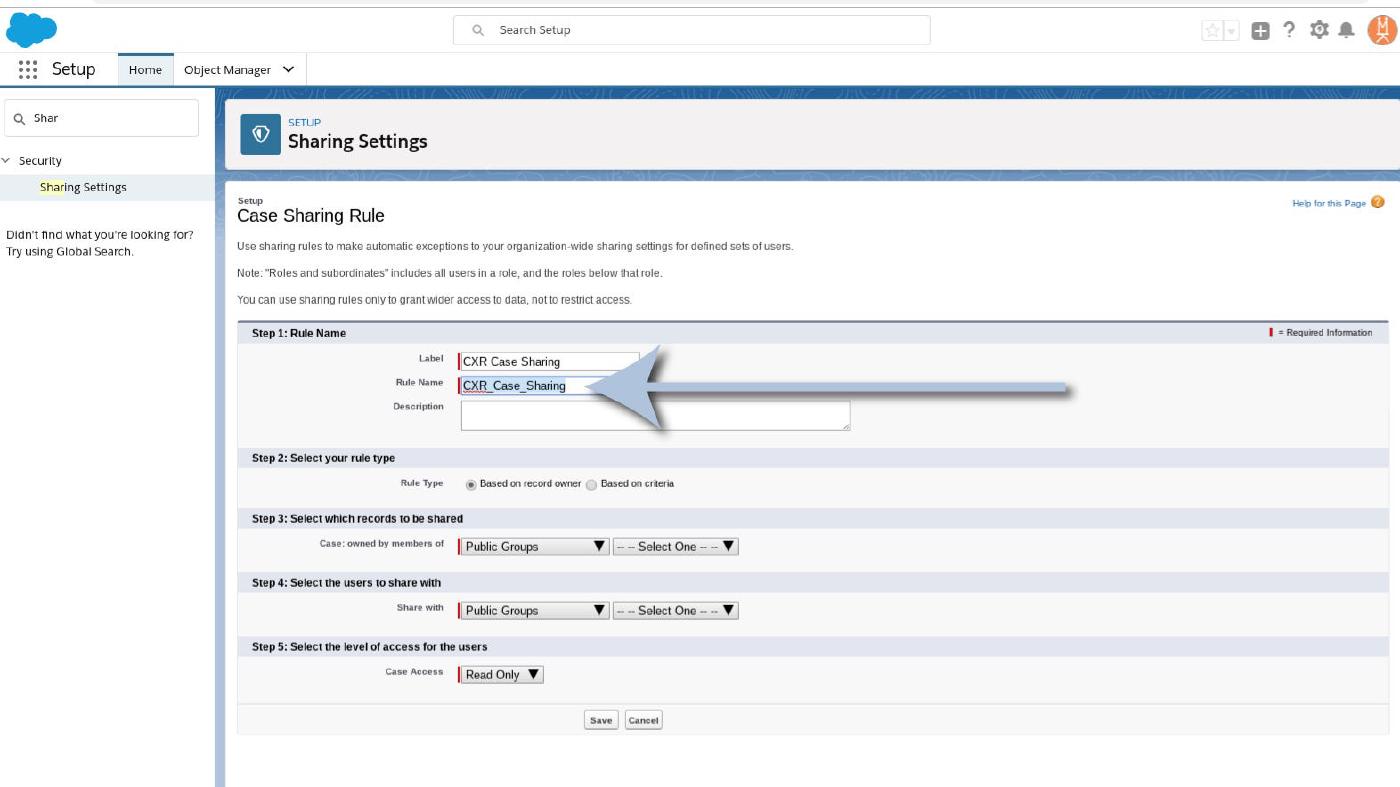
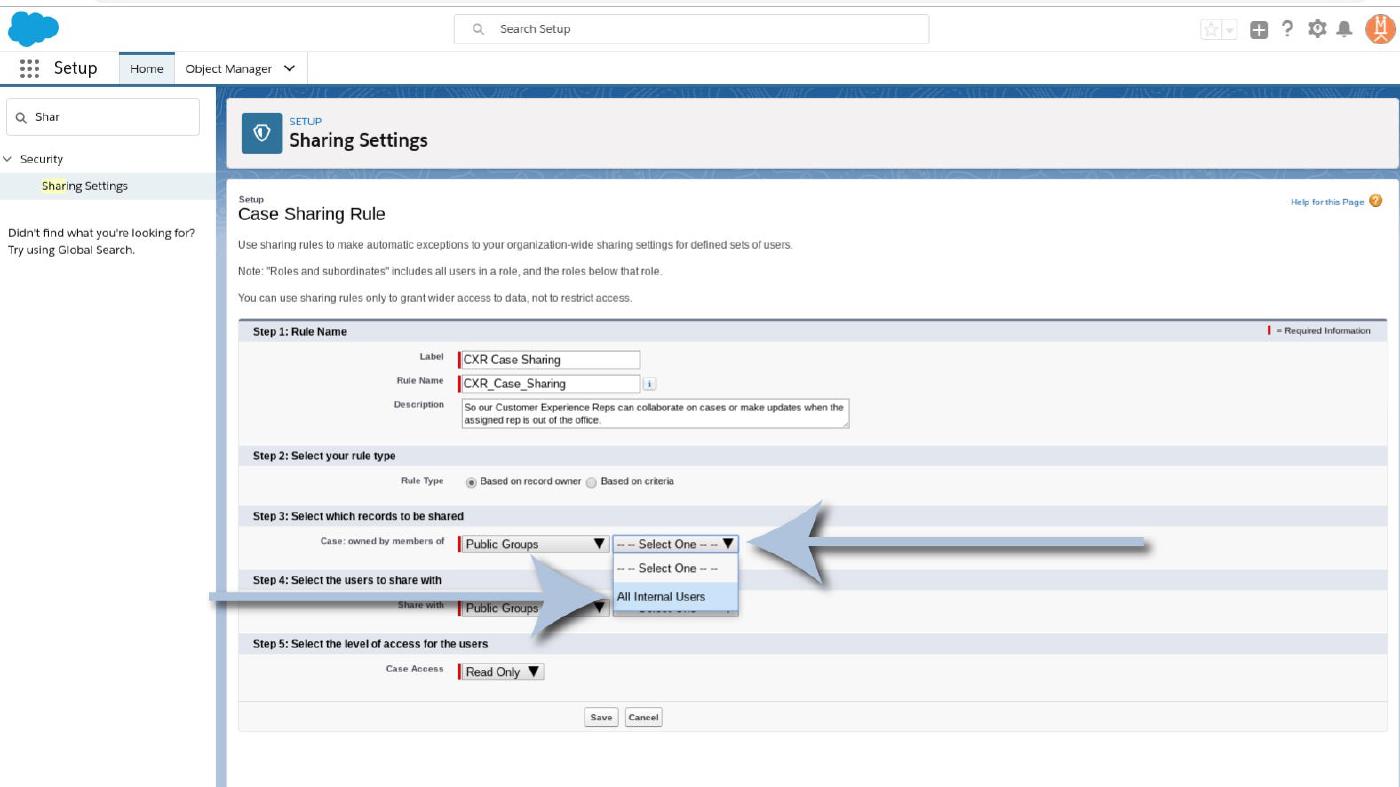
Adding a Description is optional, but it’s a good habit to get into. Your future-self will thank you if you ever come back to make additional changes. Now, pop down to ‘Step 3’ and use the dropdown on the right set ‘Public Groups’ to “All Internal Users”.
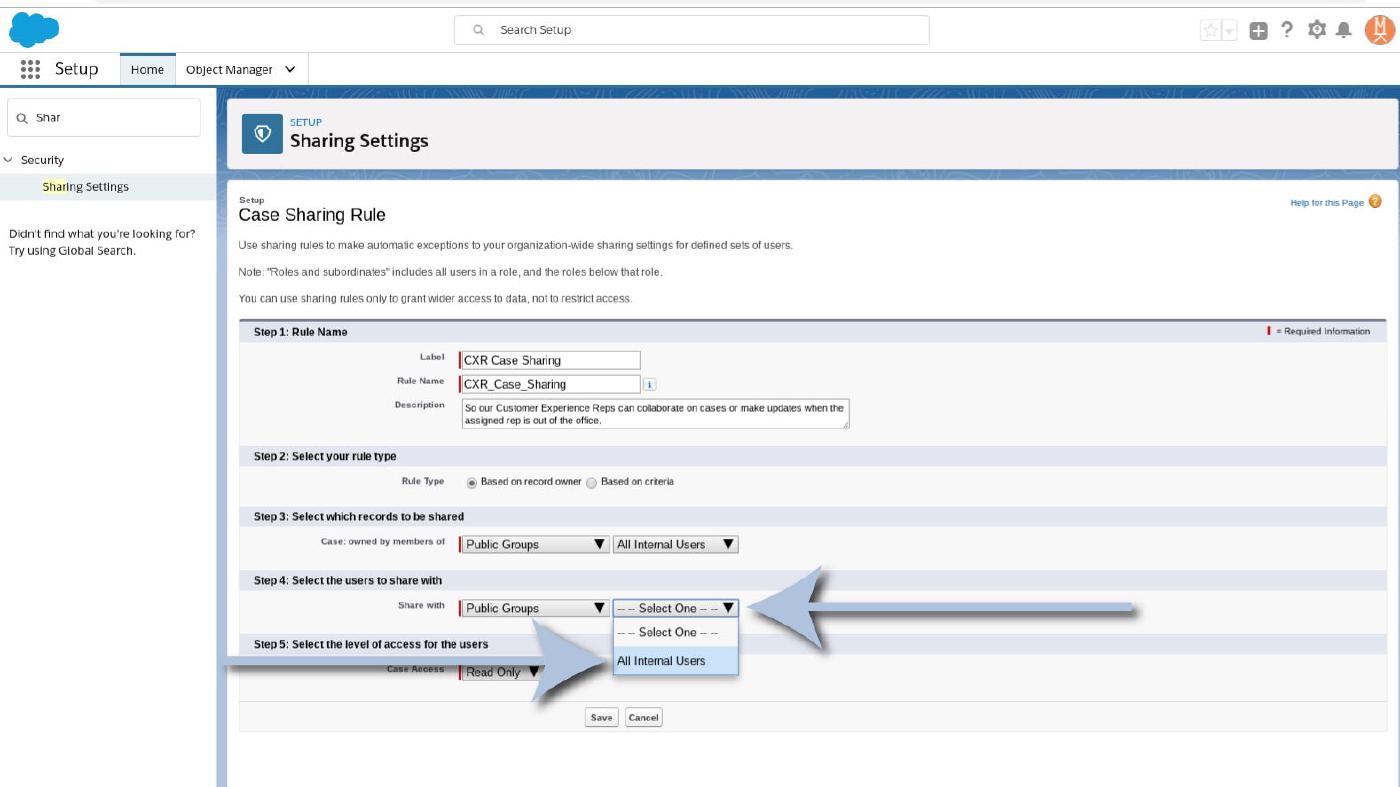
Then do the same for ‘Public Groups’ in ‘Step 4’.
In ‘Step 5’ use the dropdown to change ‘Case Access’ to “Read/Write”.
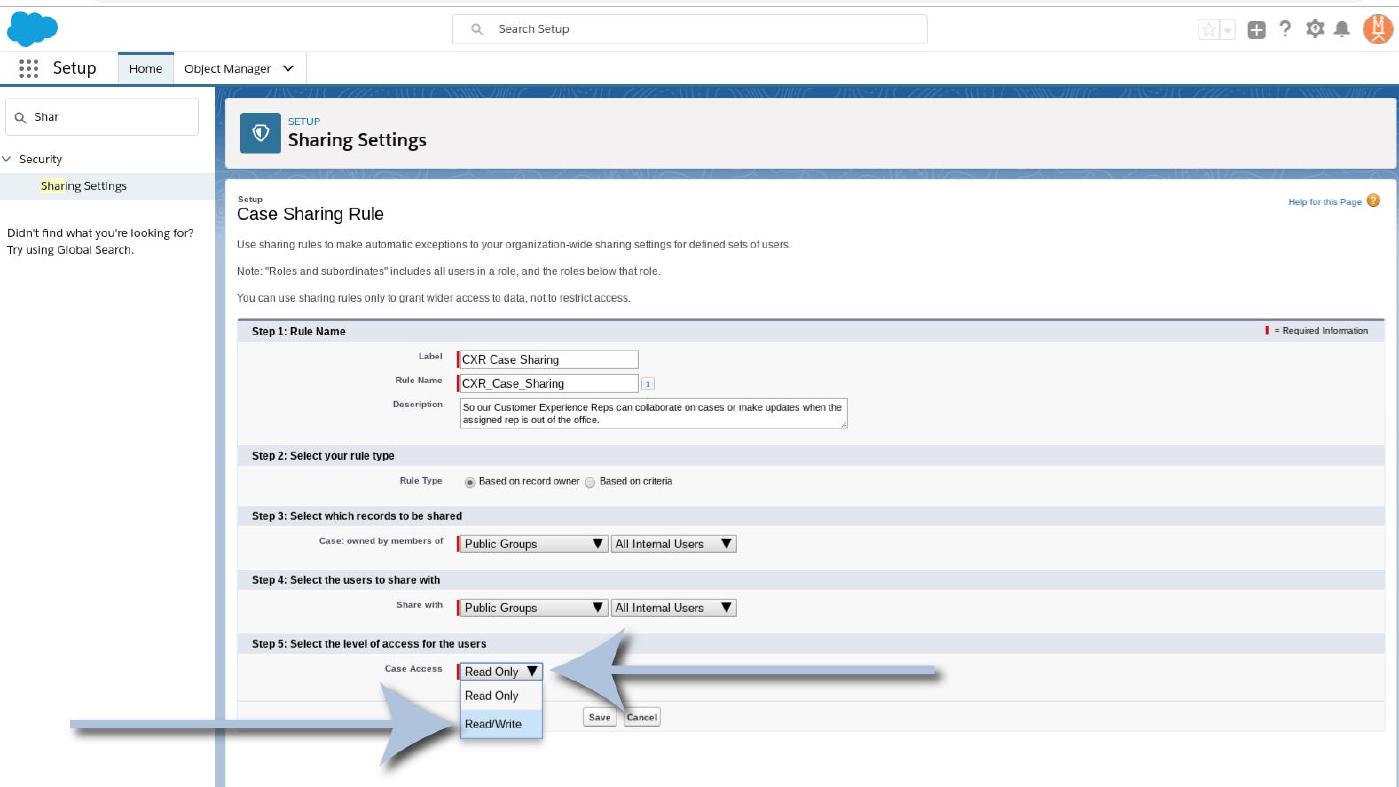
And then click “Save” at the bottom!
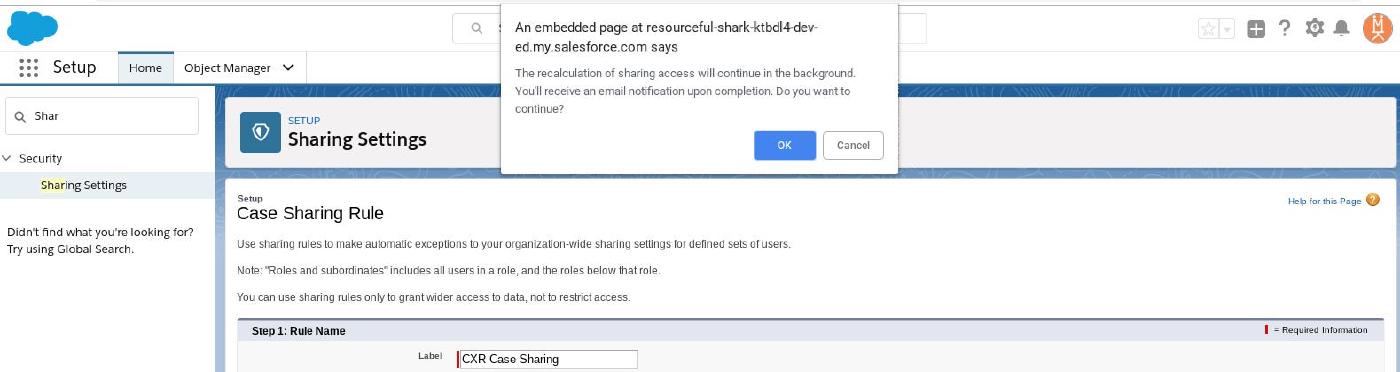
But wait, there’a another pop-up! That’s ok, it’s just Salesforce letting you know that it’s going to take a second to get everything recalculated.
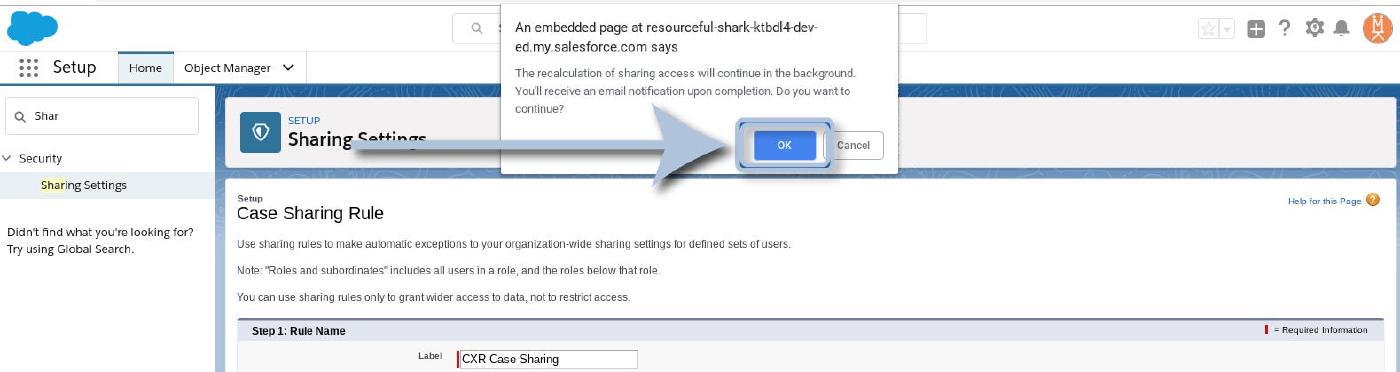
Click “OK” to dismiss the pop-up.
And then wait for one of those confirmation emails to let you know everything’s been processed.
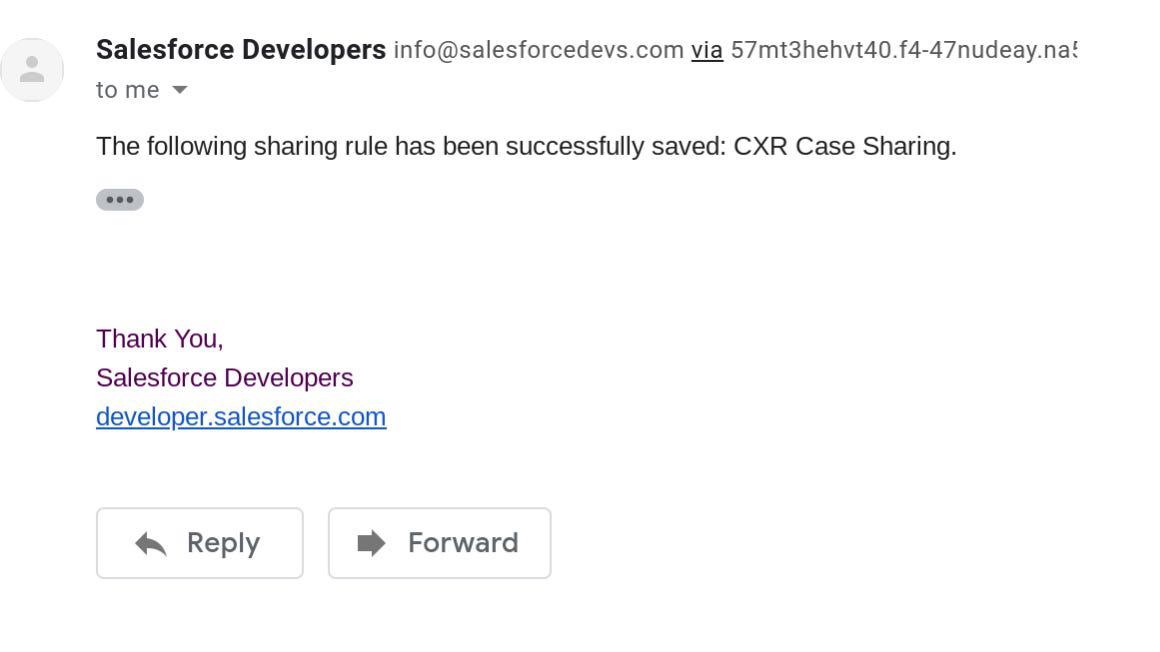
And that’s it! You’ve successfully set up case sharing for your users! Now they’ll be able to help each other keep your customers smiling, even when a case’s primary rep isn’t available.

Congratulations! You’ve just taken a big step toward improving your Customer Experience.
If you’re interested in more not-so secret Salesforce tips, tricks, and tweaks — stay tuned!
Until then, happy working!